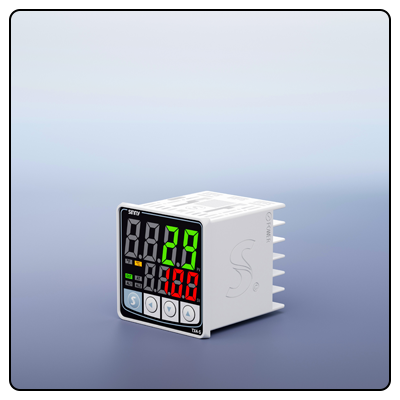
How to Install a Temperature Controller: Step-by-Step Guide
1. Introduction
Learn the ins-and-outs of installing a temperature controller using our step-by-step guide. Identify different kinds of controllers, preparation steps for installation, testing procedures and troubleshooting processes so as to achieve maximum performance from your installation process.
Temperature controllers are essential devices used in various industries and applications to achieve desired temperature settings, from controlling heating or cooling devices, to maintaining room temperatures using managed heating/cooling devices. Correct installation is crucial to its accurate and dependable functioning; this guide offers step-by-step installation steps including type selection, preparation steps, installation phases, testing phases, troubleshooting strategies for successful results.
2. Types of Temperature Controllers
Understanding Types of Temperature Controllers Being knowledgeable of all the various types of temperature controllers available will allow you to select one suitable for your application.
On/Off Controllers
On/Off controllers are among the simplest types, switching output on or off when temperatures cross their setpoint thresholds. They're ideal for applications where precise control is not essential.
3. Proportional Controllers
Proportional Controllers Proportional controllers offer more refined temperature management by adjusting output proportionally to any discrepancies between setpoint and measured temperature, helping reduce oscillations around setpoint.
PID Controllers
Proportional-Integral-Derivative (PID) controllers offer highly precise control by combining proportional, integral, and derivative actions into one package - perfect for applications requiring high accuracy and stability.
4. Before Beginning Installation
Prior to initiating installation, gather all required tools and materials. Make sure you have your temperature controller, sensors, wiring, mounting hardware and power supply; safety should always come first! And take these precautions:
5. Step One of Installation Steps
Choose an Appropriate Location For The Temperature Controller Intently consider all relevant criteria when locating the temperature controller, including; * Ease of monitoring and adjustments, plus * Accessibility.
Step Two: Mount Your Temperature Controller
To install your temperature controller securely with its included hardware and ensure its level and firm attachment are sufficient, in order to eliminate vibrations that might negatively impact its performance.
* Connect the sensor wires to their appropriate terminals while taking note of correct polarity.
* Secure connections in order to prevent loose wires.
Step 4: Connecting the Power Source
Connecting your power supply is an integral step, so follow these guidelines when connecting. * Check both voltage and current requirements of the controller
Connect the power supply wires to their respective terminals on the controller.
*To prevent electrical hazards, ensure all connections are tight and secure.
Step 5: Connect an Output Device
To connect the output device such as a heater or cooler to the controller, as shown below: * Locate and identify its output terminals on the controller
*Connect the output device wires to their appropriate terminals.
* To prevent short circuits, ensure all connections are insulated and secure.
Step 6: Initial Set-up and Configuration Once all connections have been made, proceed with initial configuration by powering on your temperature controller: * Recharge its batteries
* To set your controller according to manufacturer's instructions.
* To set the desired temperature setpoint and other parameters.
* Conduct an initial test to make sure the temperature controller responds appropriately when temperature levels change.
As soon as your temperature controller has been installed, it is crucial that it is tested and calibrated to ensure its accurate functioning.
6. Verifying Connections
* Always double-check electrical connections for tightness and correctness before connecting any new appliances or wiring systems.
* Check for loose wires or exposed conductors to make sure there are none present.
Calibrating Your Controller
* To achieve accurate temperature readings from your controller, follow its manufacturer's calibration procedure for best results.
* To adjust and compare controller readings, calibrated reference thermometers can help.
Testing Under Different Circumstances
* It is essential that the controller respond to various temperature variations by performing tests under various environments and temperature changes.
* Confirm that the controller maintains its setpoint accurately and responds appropriately when deviations arise.
Troubleshooting Common Issues
Even with careful installation, issues may still arise and need to be solved. Here are some commonly-seen ones and their possible remedies:
* If your controller fails to power on, check its power connections and ensure the appropriate voltage has been applied.
* Confirm that the power switch is turned on.
Temperature Reading Inaccuracy
* To ensure accurate temperature readings, ensure the sensor is connected and placed properly.
Calibrate the controller to identify any discrepancies.
Output Device Not Responding Before checking any connections between controller and output device, ensure both are in proper working condition.
* Confirm that all output settings have been correctly configured.
7. Conclusion
Installing a temperature controller requires careful attention to detail. By following the steps outlined here, you can ensure a successful installation that provides accurate and reliable temperature regulation. Routine maintenance and calibrations should also be undertaken periodically in order to optimize performance and extend lifespan of the controller.
- How to use Inkbird Temperature Controller
- How to Tune a PID Temperature Controller: A Comprehensive Guide


