


How To Wire A PID Controller
1. Understanding PID Components

It is important to understand the key functions and components of a PID control before wiring it.
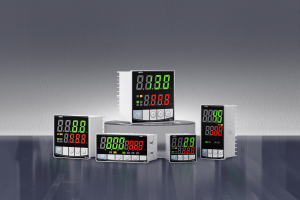
PID controller
It is responsible for controlling the process variable. The PID controller receives signals from sensors, adjusts outputs to control heat, cool, or any other actuators, based on proportional gains, integral gains, and derivative gain.
2. emperature sensor
Temperature sensors such as Resistance Temperature Detectors, or thermocouples (RTDs), send signals to the PID control. The temperature range and application determine the sensor to be used.
Power Supply
Power is supplied by the power supply to other components and PID controller. Selecting a power source that meets the voltage and current needs of the PID Controller is crucial.
Relay
Safety Measures
Electrical systems require a high level of safety. Avoid electric shocks by turning off the electricity before you begin wiring. Wear appropriate protective gear and follow all safety instructions.
Wiring Diagrams
Use these simple steps to effectively wire a PID Controller:
Find Wiring Points
The PID controller has input, output and power terminals. Consult the manual of your controller to find out how it is wired and what terminals are used.
3. How to connect the temperature sensor
Find Sensor Terminals: Locate terminals on PID controller for temperature sensors.
Connect Wires: Ensure proper polarity by connecting the sensor wires securely to the input terminals. (positive to positive and negative to negative).
Check Connections. Use the multimeter to check that all connections are solid and free of short circuits.
Connect the Power Supply
Find the Power Supply Terminals: Locate power supply terminals located on PID controller.
Connect Power Wires Connect power wires at the terminals. Ensure proper voltage and polarity.
Securing Connections: Tighten terminal screws in order to prevent wires from being loose.
4. How to Wire the Relay
Find Output Terminals: Locate output terminals of the PID controller to connect the relay.
Connect relay wires: Attach the relay wiring to the terminals of the output, making sure that the connections are secure and the contact is good.
Check Relay Function: You can use a multimeter by manually activating the PID Controller to verify the relay's operation.
Connecting the Heating/Cooling device
Find the Terminals of the Device: Locate terminals on the Heating/Cooling device.
Connect device wires: Attach devices to the output of the relay. This will ensure proper connections.
Check the device operation: Check the heater/cooler to make sure it is responding correctly to PID signals.

5. Test and Adjustments
To ensure that the PID controller is working properly, you should perform these tests and adjustments after wiring it:
Start the PID Controller: Switch on the power and check the display of the PID Controller for abnormal behaviour or error messages.
Set PID: Modify the PID settings in accordance with the recommendations of the manufacturer and specific requirements.
Test System: Test system in different scenarios. For example, changing the setpoints or adding additional load steps.
Adjust PID values: Achieve optimal performance by fine-tuning the gains proportional, integral and derivative based on system response.
Check Safety Measures: Make sure all safety measures have been implemented and that there aren't any loose wires or connections.
To properly wire a PID, you must pay attention to every detail. You also need to understand the components and their functions. Follow the instructions in this guide to ensure that your PID controller is properly wired and performs optimally. PID controllers must be properly wired to maintain desired process variables. This is crucial in both industrial and commercial applications.
- Comprehensive Guide to Designing a PID Controller for Optimal PerformanceIntroduction
- The Complete Guide to Tuning a PID Controller Manually