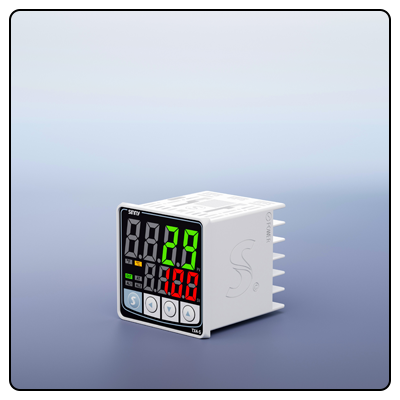
How to Connect a Solid State Relay (SSR) to a Temperature Controller: A Comprehensive Guide
Learn how to connect a Solid State Relay (SSR) to a temperature controller with our detailed guide. Follow our step-by-step instructions for a safe and efficient setup.
1. Introduction
Solid State Relays (SSRs) are crucial elements in temperature control systems, providing reliable and efficient switching capabilities. Unlike mechanical relays which rely on moving parts for switching capabilities, SSRs do not. Therefore, SSRs offer more durability for applications that require frequent switching than mechanical ones do. Temperature controllers regulate heating or cooling elements to achieve the desired temperature setting - this guide will offer step-by-step process on connecting an SSR to such controllers to achieve optimal performance and safety for optimal results.
2. Understanding the Components
As part of any connection process, it's vital to gain an understanding of all components involved. SSRs (solid state relays) use small control signals from one source to switch a larger load more quickly and silently than traditional mechanical relays; temperature controllers like Inkbird ITC-308s provide temperature monitoring/control in numerous applications including industrial heating systems, home brewing equipment and HVAC systems - featuring displays with control buttons as well as input/output terminals to connect sensors or relays to.
3. Precautionary Measures
Safety should
always be your top priority when working with electrical components, so make sure that you heed these precautionary measures: * Switch Off Power Source Before Installation It is always advisable to disconnect power before beginning an installation job in order to avoid potential electric shock hazards.
Assemble the Tools:
Before commencing any task, gather all relevant tools such as screwdrivers, wire strippers and multimeters.
Verify Specifications:
Make sure the SSR and temperature controller meet both voltage and current requirements for your application.
Adhere to manufacturer instructions:
Referring to user manuals will give specific safety instructions and wiring diagrams.
4. Wiring DiagramWingnut
A clear wiring diagram is essential to comprehending how the SSR connects with a temperature controller, here's an abbreviated one for easy understanding:
5. Temperature Controller
Temperature Regulator [TCR/ TCU ] | Sensor Input, Power Input and Output Terminals. Output Terminals connect directly with SSR control side for output terminals. (SSR). [ SSR ]. ]............ [ Solid State Relay [ SSR ]. ]...... [ SSR]. ]...... [ SSR]. ]....... [ SSR]. ]...... [| Sensor Input, Power Input and Output Terminals. Output Terminals connect directly with SSR control side for output terminals. (SSR). [ SSR ]. ]............ [ Solid State Relay [ SSR ]. ]...... [ SSR]. ]...... [ SSR]. ]....... [ SSR]. ]...... [
Control Side |----> Temperature Controller Output Terminals [TCR], Load Side [PSU & Load] (Heater or similar device), Step by Step Connection Guide. [STEP 1 : Preparing Components ], step two would include connecting components through step-by-step connection guide with components being prepared prior to step one and vice versa|----> Temperature Controller Output Terminals [TCR], Load Side [PSU & Load] (Heater or similar device), Step by Step Connection Guide. [STEP 1 : Preparing Components ], step two would include connecting components through step-by-step connection guide with components being prepared prior to step one and vice versa
Collect all necessary components, such as the temperature controller, SSR, temperature sensor and power source as well as load (for instance heater).
Make sure the power has been switched off prior to beginning an installation project.
Step Two:
Connecting a Temperature Controller [IN1]
To connect your temperature sensor to its designated input terminal on the temperature controller.
Connect the power supply cord directly to the input terminals on the temperature controller while taking care to observe proper polarity.
Step 3: Connecting an SSR* To connect the SSR, the control side must be connected directly to the output terminals of a temperature controller in order to receive control signals from it and send these to its SSR counterpart. This connection enables temperature controls to transmit control signals directly.
To connect a SSR load side, connect both terminals: one to power source and another one connected directly to load (e.g. heater). This typically results in having two terminals on its load side connected.
Step 4: Final Checks* Double-check that all connections are secure and correctly wired before moving on to Step 5.
6. Testing the Setup
Be certain there are no loose wires or exposed terminals which could potentially lead to short circuits and electric shocks.
Once all connections have been made, it's important to conduct an initial test on the setup:
Switch on Power Supply/Turn On Temperature Controller To Ensure Correct Operation* To power on and turn off system: Switch power source on and view temperature controller display to make sure system starts up properly
Validating Function:
Set your temperature controller to desired levels and observe its operation - specifically its switch sequencer which should switch loads on and off according to temperature controller signals.
Adjusting Settings:
Fine tune your temperature controller's settings until you achieve desired performance results.
7. Troubleshooting
If the system doesn't function as intended, follow these troubleshooting steps:
Verify connections:
Make sure all cables and terminals are securely fastened together without loose connections or exposed terminals.
Verify compatibility:
Confirm that both SSRs and temperature controllers meet all voltage and current specifications necessary for the application in terms of voltage and current requirements.
test components:
Utilizing a multimeter to check continuity and functionality of SSR and temperature controller components can ensure successful functioning.
Consult Your User Manuals:
Consult the user manuals for specific troubleshooting tips and error codes.
8. Connecting
a Solid State Relay to a temperature controller is an effortless and straightforward process that will greatly increase efficiency and reliability of your temperature management system. By following this guide, you can ensure a safe and effective set-up, giving precise temperature control in any application you are working on. Be sure to put safety first by double checking connections as well as consulting manufacturer instructions to get optimal results.
- How to Use a PID Temperature Controller: A Comprehensive Guide
- How to Set Up an Inkbird Temperature Controller


