How to Set Up an Inkbird Temperature Controller
Learn how to set up your Inkbird temperature controller with our comprehensive guide. From unboxing to advanced settings, we cover everything you need to know for optimal performance.
1. Introduction
The Inkbird temperature controller is an all-purpose solution designed for home brewing, greenhouse management and aquarium temperature regulation. This guide will walk you through its setup process so that it meets all of your specific temperature management requirements.
Unpacking and Components
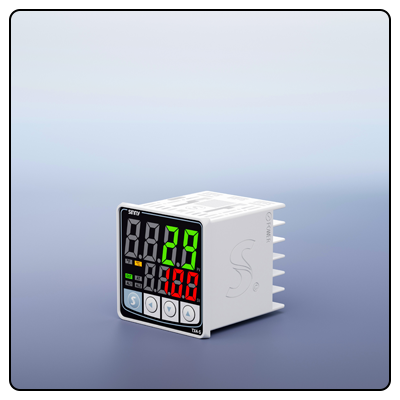
Once you unbox an Inkbird temperature controller, there will be several components inside. These typically include the main controller unit, temperature probes and power sockets as well as user manuals containing user instructions and displays for setting parameters as well as probes which measure temperature readings. The display and buttons for setting parameters as well as probe measurements all comprise main parts of this temperature control device.
2. Initial Set Up
Plug in Your Controller:
Begin initial setup by plugging your controller into an appropriate power source that meets any voltage specifications outlined in your user guide.
Clamp the Temperature Probe on:
The controller features an available port that you should insert your temperature probe into, in order to monitor its temperatures throughout your environment or equipment. This probe will help provide real-time temperature readings of what it measures in terms of environment or equipment temperatures.
Setting the Desired Temperature
Entering Settings Mode:
Press and hold the SET button to enter settings mode; the display will show current temperature settings.
Setting Target Temperature (TS Value):
To adjust, use the up and down buttons to set your ideal target temperature; at that temperature point the controller will activate heating/cooling devices as you wish.
Establish Heating and Cooling Differentials (HD and CD Values):
These values determine how far off target temperature it may stray before activation by the controller. For instance, if 25degC is your desired target and your heating differential value is set to 2degC, for instance when temperature falls below 23degC the heater will activate automatically and come on.
3. Advanced Settings
Setting Alarm High and Alarm Low Values:
With these settings you can configure high and low temperature alarms so if either temperature exceeds these preset values the controller will sound an alarm and warn of impending danger.
2. Establish the Compressor Delay (PT Value):
This feature protects your equipment by stopping its compressor from cycling on and off too quickly, setting an appropriate delay time depending on its specifications.
4. Calibration and Testing
Calibrating the Temperature Sensor:
To ensure accurate readings, calibrating your sensor may be necessary to achieve precise results. Follow your manual's instructions for calibrating and setting calibration levels accordingly.
Attaining Verification of Setup:
Once configured, test the controller by placing its probe in an environment with known temperature levels and verify that its action activates heating/cooling devices as desired.
5. Troubleshooting
Common Issues:
If your controller is malfunctioning, first verify all connections and make sure the probe is securely in its port. Referring to your manual will also help provide specific error code meanings and explanations. 2. For complex errors that appear frequently such as memory corruption issues.
Maintenance Tips:
Inspect and clean the probe as necessary, so accurate readings. Keeping an eye on wear-and-tear in both its connections and probe should ensure reliable performance and accurate readings.
6. Conclusion
Installing an Inkbird temperature controller can be straightforward when following these steps. By maintaining optimal conditions in your environment or equipment, increasing efficiency and performance.
- How to Connect a Solid State Relay (SSR) to a Temperature Controller: A Comprehensive Guide
- How to Reset W1209 Temperature Controller: Step by Step Guide


