


How To Install A Temperature Controller?
Using our in-depth guide, discover all of the key steps involved with installing temperature controllers. Learn about preparation, mounting, wiring, and final checks to ensure safe and efficient operations.
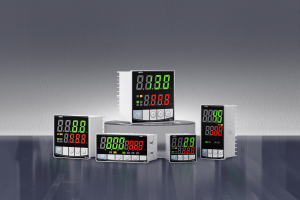
Installation of temperature controllers requires careful thought and knowledge of electrical systems. From setting one up in an industrial furnace or home brewery system to greenhouse environments, installing temperature controls requires multiple key steps that must be undertaken for both safety and functionality purposes. This article offers an in-depth guide for setting up one, from preparation through to final checks.
1. Preparation
Prepalitat To begin the installation, gather all necessary equipment - the temperature controller, power supply, wires, sensors, and tools such as screwdrivers and wire strippers. Also, please make sure you have any special tools needed, such as drills, if mounting the controller to walls or panels is required.
Select a Location
It is best to place the controller somewhere that will protect it from direct heat sources, vibration, and moisture to guarantee accurate readings and avoid potential damages. Furthermore, maintenance personnel should easily have access to perform repairs as required, with enough room available during installation for working comfortably on site.

2. Mount the Controller
Install the controller according to manufacturer recommendations for mounting it securely, such as attaching it to walls, panels, or other stable surfaces. Make sure it remains level and securely in its place without movement that could hinder its functionality.
3. Wiring Connections
Attach the temperature sensor to the controller by matching its specifications; connect this, in turn, to power supplies and any necessary switching devices, such as relays, contactors, or solid-state relays. Lastly, check that all connections are tight and secure and that they conform to local electrical codes.
4. Power and Testing
Once all connections have been made, turn on the power to test the controller. Simulate temperature fluctuations to observe any responses; this step helps verify that everything has been completed as intended and that everything works as it should.
5. Programming Your Controller
Establish the desired temperature parameters, including setpoint, differential temperature, and alarm or safety features. If your controller features auto-tune, take advantage of it to optimize its performance for your specific application; its auto-tune feature enables it to learn your system characteristics and customize itself for optimal results.
Final Tests
Once programing has concluded, conduct final checks to ensure your controller maintains the desired temperature within your system. Look for any error messages or alarms and address them accordingly to ensure the controller not only maintains the desired temperature but also responds correctly to deviations in temperature.
6. Documenting Installation
Be sure to document every detail of the installation process, such as date, settings, and any specific instructions that were followed during setup for future reference. Keep your controller manual and wiring diagram close at hand in case troubleshooting or future maintenance become necessary.