


How to set up and tune a PID controller: A Comprehensive Guide
1. Setup a PID Controller

Learn how to setup and tune your PID controller using our guide. Master the wiring and calibration steps for precise control.
Required Components
Gather the following components before you begin the installation process:
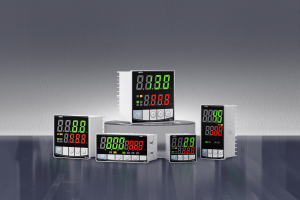
PID controller The central unit which performs control calculations.
Sensor of Temperature: Device that measures the temperature in the system.
Power supply: Supplies the required electrical power for the PID Controller and other components.
Relay An electromechanical switch that controls the temperature of a device.
Heater/Cooler: An apparatus which regulates the temperature in a system. For example, a cooler or heater.
The PID controller is not effective without each of these components. The relay is an intermediary that manages power supply, while the temperature sensor gives real-time information.
2. How to wire the PID controller
Wiring is essential to ensure that the PID and its components are communicating effectively. To wire your PID Controller, follow these simple steps:
Connecting the Heating/Cooling device Attach the cooling or heating device to the relay. The PID controller can then regulate the device according to the readings.
Initial Configuration
After the wiring has been completed, you can begin the initial configuration of the PID Controller:
Turn On the PID Control: Power on the controller and confirm that it is getting power. Display should be illuminated, which indicates that the controller is working.
Configure Temperature sensor: Open the Settings menu of the PID controller, and select the temperature sensor type you're using. This ensures that the temperature is accurately measured.
Enter the Desired Setpoint Input the desired setpoint temperature into the PID Controller. The setpoint is the temperature that you want to achieve.
Proportional Tuning (P): The proportional gain is used to determine the controller's response to an error. The stability of the system is affected by the adjustment of the proportional gains. Increase the gain gradually until you reach a stable system.
Tuning Integral (I). The integral gain is used to account for errors that accumulate over time. Integral gain adjustment helps to eliminate error at steady state. To reduce the amount of time required for the system's set point to be reached, increase the integral gain.
Derivative Tuning : The derivative gain is a response to the rate at which the error changes. The derivative gain can be adjusted to dampen oscillations, and increase system stability. To improve the response time and reduce overshoot, increase the derivative gain.
To fine-tune these parameters, you must test and adjust them carefully. The proportional gain should be the first to be tuned, then the integral gain and the derivative gain. It is important to find a balanced system that responds accurately and quickly without oscillation or excessive overshoot.

3. Calibration and Testing
It is important to calibrate and test the system after tuning the PID parameters.
Test: Run tests to verify that the PID controller functions correctly. Watch the response of the system to external and internal disturbances. Note any deviations or irregularities.
Calibrating the System: The calibration ensures that the system has precise temperature control. Comparing the temperature measured with the standard is necessary to adjust the PID parameters.
Troubleshoot Typical Issues Identifying and resolving common problems such as incorrect sensor wiring or parameter setting.
The process of setting up a PID control system involves several systematic steps. These include gathering the necessary components, wiring it and tuning its parameters. PID controllers configured correctly ensure optimal performance in a wide range of applications from home automation to industrial processes.