How to Set Up a PID Temperature Controller: A Comprehensive Guide
Learn how to set up a PID temperature controller with our step-by-step guide. Ensure precise temperature control with expert tips on wiring, tuning, and troubleshooting.
1. Introduction
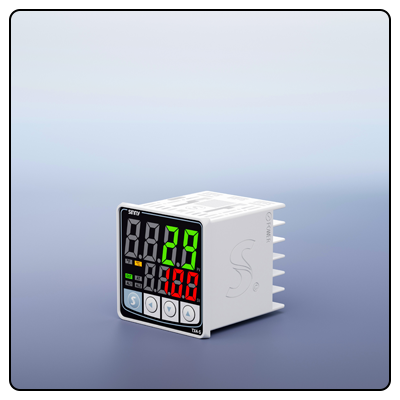
A PID (Proportional-Integral-Derivative) temperature controller is an invaluable asset in various industrial and laboratory settings, providing precise temperature regulation to maintain consistent thermal conditions during processes that demand consistent heating conditions. In this guide we'll go through how to set up such a controller efficiently to maximize performance and reliability.
2. Components Required
Before getting started, gather all the components needed. * PID Controller: This essential piece will manage temperature regulation.
Temperature Sensor: This component typically comprises of either a thermocouple or RTD (Resistance Temperature Detector).
Power Supply: Used to power the PID controller.
Relay: Either a solid state relay (SSR) or mechanical relay can be used to switch on or off heating/cooling devices.
Heating/Cooling Device: This will be controlled by a PID controller.
3. Wiring the PID ControllerWiring the PID Controller
Connect Temperature Sensor to PID Controller Secure all connections as specified for sensor type; and connect sensor directly into designated input terminals on PID Controller for proper functioning and secure connections;
Wire PID Control in Place W.I.N
Wiring the Relay:
Secure the relay to the output terminals of the PID controller so it acts as a switch for your heating/cooling device. ot 4. Connecting Your Heating/Cooling Device To Relay: Join it securely with its respective relay, making sure all connections are tight and properly insulated before attaching it to it.
Grounding:
To avoid electrical hazards and protect all connected devices from overloads or surges, always connect all PID controllers and other connected devices to an adequate ground source.
4. Initial Set Up
From Power On, Verify Receiving Power:
Start up your PID controller. 2. From Initial Configuration, Confirm that all Power is received
Configure Sensor Type:
Configure the PID controller so it recognizes what type of temperature sensor is being used (for instance a thermocouple type K or RTD sensor). 3. Set Temperature Setpoint: Provide the setpoint temperature that you would like your system to maintain and press "Submit."
Tuning PID Parameters
A PID controller uses three parameters - Proportional (P), Integral (I), and Derivative (D). Each must be tuned individually in order to maximize efficiency and performance. To optimize results, these must all be carefully adjusted in order to provide optimal temperature regulation.
Proportional (P): Calculates the reaction to current temperature error, 2. Integral (I), and 3 Derivatives. Chacun of these functions measures one or more aspects of an error's rate of change, respectively.
Auto-Tuning Modern PID controllers often come equipped with auto-tuning functionality. This feature enables the controller to automatically tune its PID parameters for optimal performance, eliminating time spent manually tweaking. To utilize auto-tuning:
To enable autotuning mode on a PID controller.
Allow it to cycle through heating and cooling processes. 3. The controller will adjust PID parameters depending upon system response.
5. Manual Tuning
If auto-tuning is unavailable or doesn't produce satisfactory results, manually tuning can provide another alternative: manually adjust PID parameters:
Initial Settings: Start off by starting out with low proportional gain values (P), integral values at zero (I) and derivative values (D), then increase proportional gain until system oscillation occurs around its setpoint (setpoint = P = D = 0, as measured with integrals = I and derivative values as D. To adjust proportional gains further: set initial P values below 50 percent then gradually adjust up until oscillation happens around that value (setpoint= P). 4. Eventually Adjust Proportional Gain Until It Occurs Approximately Once More
Set Integral Gain: Stepwise increase integral gain to reduce steady-state error.
Adjust Derivative Gain:
Raise derivative gain for reduced overshoot and enhanced stability.
Monitoring System Response and Calibration
To test and calibrate, observe how your system responds to temperature changes by watching how quickly and precisely it reaches your setpoint without overshoot or oscillation. 2. Adjust Parameters Its Fine-tune the PID parameters as necessary until stable temperature control can be achieved with accurate temperature regulation. 3.
Calibration: Regular calibration of both temperature sensors and PID controllers to maintain accuracy will keep their operation accurate and precise.
Troubleshooting
Common Issues: (* * ** Sensor Errors ( * 17 * 1)) Check connection points and make sure the appropriate sensor type has been selected ( ).
Inconsistent Temperature: Re-tune PID parameters or look out for external influences which might be altering temperatures.
Relay Malfunction: Confirm the relay is operating properly before replacing as necessary.
Check connections and components regularly
To prolong its functionality and eliminate dust accumulation on both controller and sensor.
If applicable, update firmware as necessary.
6. Conclusion
Setting up a PID temperature controller involves careful wiring, initial setup, tuning and testing - by following this guide's steps you can ensure precise and reliable temperature regulation for your application. Furthermore, regular maintenance will help sustain its performance over time.
- How to Operate a Temperature Controller: A Step-by-Step Guide
- How to Connect a PT100 Temperature Sensor to an Electronic Temperature Controller


