

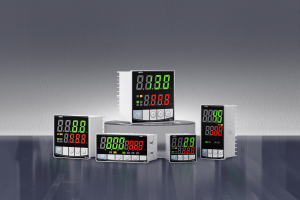


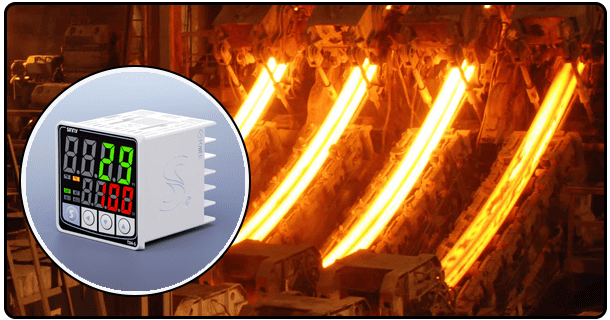
How to Install and Calibrate an Industrial Temperature Controller: A Step-by-Step Guide
With this comprehensive guide, learn how to set up and calibrate an industrial temperature controller correctly in no time at all! Following step-by-step instructions will guarantee accurate, dependable operation of this essential tool for proper environmental conditions.
1. Preparation
Before embarking on any installation and calibration processes, it is imperative that all necessary tools and equipment be assembled. This may include gathering tools like a multifunction process calibrator, standard multimeter, test leads and probes as well as any specific ones required by your temperature controller model. Doing this will streamline and speed up the installation and calibration processes without creating unneeded delays or complications.
Safety Precautions: Safety should always come first when performing work on any system. You should adhere to all relevant safety guidelines, which includes wearing appropriate personal protective equipment (PPE), such as gloves, safety glasses and protective clothing. Furthermore, ensure all electrical hazards have been neutralized prior to commencing any tasks and double check that all power sources have been turned off and locked out before beginning any task or undertaking work on an energy source.
2. Installation
Secure the Controller: Begin by mounting your temperature controller securely into its designated place - such as on a control panel, wall, or any other suitable surface. Use suitable hardware to ensure its alignment and secure mounting for optimal operation of the temperature control unit. A stable installation ensures accurate temperature regulation!
Electrical Connections: Once complete, begin with electrical connections. Attaching power sources to controllers while meeting any voltage or current specifications provided by their manufacturers is the next step, followed by connecting temperature sensors such as thermocouples or resistance temperature detectors (RTDs) directly into input terminals on controllers for easy monitoring, followed by connecting output devices like heaters or coolers directly through output terminals - always carefully following manufacturer wiring diagrams!
Initial Power-Up: Once all connections have been made, power on the controller and check for any error messages or issues with its functioning. If any appear, refer back to your user manual's Troubleshooting section for resolution; additionally make sure all connected devices function as planned before proceeding further with initial Power-Up steps.

3. Calibration Setup
Establish Calibrationuiesc Calibration is essential in ensuring the accuracy of a temperature controller. Start by connecting all temperature sensor connectors securely, followed by calibrator connections which simulate what your controller might receive during normal use - for this step use an accurate thermometer as your calibrator (this should take 10 min total). Finally connect calibrator's temperature signal simulator which simulates what controller would see during its normal operations for best results.
Establish Calibration Points: Determine calibration points based on the operating range of your temperature controller. Calibration points serve to test and adjust accuracy within its operating range - typically this involves selecting specific temperatures where calibration can take place such as minimum, midpoint and maximum values e.g. for controllers operating between 0degC to 100degC you might select calibration points at 0, 50 and 100 degC temperatures respectively.
4. Calibration Procedure
Zero Calibration: Begin calibrating by setting your controller to its zero point temperature - typically, the lowest one within its operating range - using your calibrator as a simulation, making any required changes so the calibrated output matches up exactly with what appears on your controller display screen. This step ensures your temperature controls accurately read out its lowest reading.
Calibration Span: Next, set the controller at its maximum point; this represents the highest temperature within its operating range. Utilizing a calibrator, simulate this temperature before making any necessary changes to ensure that its settings accurately read as the highest point temperature. Taking these steps ensures accurate temperature readings by your controller.
Intermediate Points: In order to maintain linearity and accuracy across your entire operating range, check and adjust your controller at intermediate points. For instance, if your calibration points include 0degC, 50degC and 100degC respectively, be sure to also test its accuracy between 25degC and 75degC using your calibrator by simulating these temperatures using it's simulator and making necessary changes accordingly to its settings.
5. Verification
Record Readings: As part of the calibration process, record each calibration point's readings from both temperature simulated by the calibrator and displayed by your controller. An accurate record-keeping is crucial in verifying and tracking controller performance over time as well as for future reference purposes.
Adjust if Needed: After collecting readings, compare them against what would be expected, making any necessary adjustments to bring readings within tolerance range and continue the calibration process until all results are consistent and accurate.
6. Completion
Reconnect System: Once calibration has been successfully accomplished, reconnect the temperature controller with its system and ensure all connections are secure - with no loose wires or broken connections present - before double-checking that power, sensors and output devices are properly linked together.
Final Testing: Conduct one last test to ensure the controller is functioning as intended in your system, by running under normal operating conditions and closely watching its performance. Make sure it accurately reads and maintains desired temperatures, with all connected devices responding accordingly.
Prepare a Calibration Report: After each calibration procedure is complete, prepare a detailed calibration report documenting its steps - such as calibration points, readings and any adjustments that were made - serving as a record and can later serve as reference or audit material. Please include information such as date of calibration, technician name and name/model serial number of temperature controller(s).
- Industrial Temperature Controllers: Key Features and Applications
- Explore Industrial Temperature Controllers for Pharmaceutical Production: A Comprehensive